
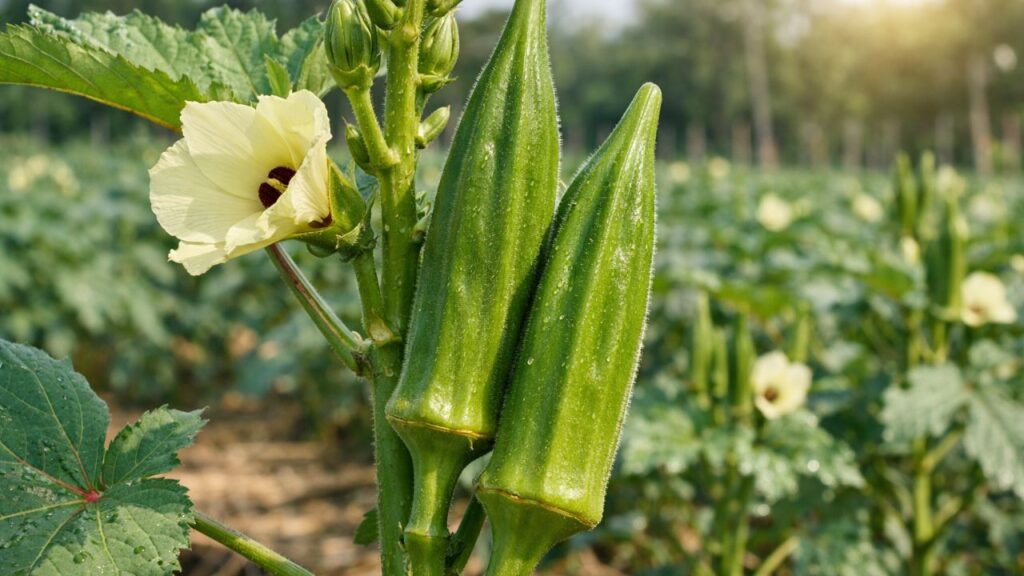
The first thing you notice is the sound. Before you see the plants or feel the sun you hear it: the soft rasp of okra leaves rubbing against one another in the heat. It’s the sound of a plant that doesn’t just tolerate summer but revels in it. Step closer and the air grows warmer and thicker. Bees hum around pale yellow flowers that look almost too delicate for such a tough crop. Then you see them: pods as long as your hand & straight as green fingers. They are still tender and still crisp & glisten faintly in the morning light. This isn’t the scraggly stunted okra you half-remember from a disappointing garden experiment. This is the new face of okra grown with a method so simple and precise it feels almost like cheating.
The Secret Starts Underground: Rebuilding the Okra Root World
Okra has always had a quiet superpower in its roots. They grow long and deep and keep searching for water and nutrients even when other plants give up during drought. But for years gardeners have given okra shallow compacted soil and still expected great results. The new proven method for growing massive heat-loving okra starts where most gardeners never look which is under the surface. Picture yourself kneeling in the garden just after sunrise. The soil feels cool on your palms and looks dark & loose like chocolate cake. Instead of fighting with heavy clumpy dirt your fingers slip in easily. That texture does not happen by accident. It comes from a carefully built foundation based on three principles which are air and depth and organic life. Start by working your soil at least 12 to 15 inches deep. Okra sends down a taproot that acts more like a curious explorer than a timid houseguest & it needs room to grow. Loosen the soil with a garden fork rather than over-tilling with a machine because you want structure instead of powder. Then mix in equal parts compost and aged manure or worm castings along with a sprinkle of slow-release organic fertilizer. Okra needs heavy feeding when it aims to produce big frequent pods. Now here is the subtle but crucial twist in the new method which involves a deep nutrient trench beneath the seed or transplant. Scrape out a narrow furrow 4 to 6 inches deeper than you plan to plant and fill it with compost and shredded leaf mold & a handful of rock minerals such as rock phosphate or greensand. Then cover it lightly with soil. The roots will chase this band of fertility downward as they grow and this builds a thick resilient root system that anchors the plant against wind and heat and neglect. By the time summer hits your garden with 95-degree afternoons your okra will not be struggling at the surface. Instead it will be drawing from a deep reservoir of cool shaded soil & handling the sun like a desert native.

Seeds, Soaks, and Timing: Setting Up the Heat-Loving Giant
The Heat Shield Strategy: Mulch, Water, and Microclimate Magic
it loves heat but still needs a cool and stable root zone. That’s where many gardens fail it. Scorching sun on bare soil turns root zones into ovens and shallow watering teaches roots to hover at the surface where they don’t belong. The new proven method embraces heat aboveground while building a shaded and steady underground world. As soon as your okra plants are 6 to 8 inches tall spread a thick mulch of 3 to 4 inches around each plant. Straw and shredded leaves and dried grass clippings all work beautifully. Never use fresh clippings because they can mat & heat up. Under that mulch the soil stays cool & moist & alive with microbes. Earthworms move in. Fungal threads stretch out like invisible highways and pass nutrients to roots. The plant responds with thicker stems & deeper green leaves and more flower buds. Watering is where this method feels almost countercultural. Instead of a daily sprinkle you water deeply and less often to mimic the natural rhythms of a hard rain followed by sunny days. Once the plants are established give them a slow and soaking drink once or twice a week depending on your soil and climate. Allow the top inch to dry just slightly between waterings. Roots will sense the moisture line sinking and follow it downward. On the hottest days when the light feels almost sharp on your skin step into your okra patch and notice something. The leaves may droop slightly at midday as a kind of protective wilt to reduce water loss. Don’t panic and douse them with extra water unless the soil is dry deep down. By evening the leaves will usually perk back up. This resilience is a sign your root system is doing exactly what you trained it to do. One more layer of microclimate magic is to plant okra where it can bask in sun but still catch a bit of airflow. Avoid tight corners and wind tunnels. In humid regions this air movement keeps diseases at bay while the heat remains an ally instead of an enemy.

Feeding for Monster Pods: The High-Performance Okra Diet
Standing in front of a mature okra plant grown this way feels different. The stems are thicker than your thumb and the branching is generous. The pods come in clusters instead of one at a time. Each pod promises crispy tender slices in a skillet or pot. To reach that kind of productivity okra needs consistent balanced fuel. The new method does not rely on heavy chemical feeds that spike growth & then crash. Instead it layers a slow steady supply that matches the plant’s stages of life. At planting time the compost and mineral trench provides the base. About three to four weeks after seedlings are established you begin a regular feeding schedule. Every three to four weeks you side-dress with a small ring of compost around the base of each plant. Keep it a few inches away from the stem. You can also sprinkle an organic fertilizer with an even N-P-K ratio like 4-4-4 or 5-5-5 at low rates. Gently scratch it into the top inch of soil under the mulch. When the first flower buds appear think about pod fuel. This is the moment to give okra a modest boost of phosphorus and potassium for flowering and pod development. Avoid excessive nitrogen that would favor leaves over pods. A bit of bone meal or wood ash can play that role. Use wood ash sparingly & only if your soil is not already alkaline. A bloom-formula organic fertilizer also works well. If your plants seem pale or sluggish in midsummer a foliar spray of diluted seaweed or fish emulsion in the cool evening can wake them up. The leaves absorb micronutrients directly and respond with a deep lush green. This shows they are ready to set another flush of pods even as the heat intensifies. Done right the plant never starves and never gorges. It just hums along week after week turning sun into food and flowers into a constant supply of pods.

Comparing Traditional vs. New Proven Okra Method
| Aspect | Traditional Okra Growing | New Proven Method |
|---|---|---|
| Soil Preparation | Light tilling with minimal organic matter and shallow soil loosening | 12–15 inch deep soil loosening with compost, aged manure, and a nutrient trench |
| Planting Time | Sown immediately after frost risk, even when soil is cool | Planted only after soil reaches 70°F+ with stable warm temperatures |
| Seed Treatment | Direct sowing without any pre-treatment | Seeds soaked for 8–12 hours; optional scarification for faster germination |
| Spacing | Crowded rows with 8–12 inches between plants | 18–24 inches between plants and 3-foot row spacing for better branching |
| Watering | Frequent shallow watering on bare soil | Deep, infrequent watering with thick mulch to keep roots cool |
| Feeding | Occasional fertilizing, often high in nitrogen | Regular compost side-dressing with balanced nutrients and bloom support |
| Heat Performance | Plants often stall growth or drop flowers during extreme heat | Deep roots and mulch help maintain growth and pod setting in high heat |
Training the Plant for Constant Harvest: Pruning, Picking, and Pod Size
On a late summer morning when the light is soft and golden you walk into the okra patch with a basket and sharp pruners. The plants stand shoulder-high and some brush your cheek as you pass. This is when the new method shows its most satisfying feature: the rhythm between you and the plant. Okra responds to harvest like a musician responds to applause. The more you pick the more it produces. The key is timing. Large pods do not mean woody tough pods. They mean long thick but still tender pods that snap cleanly when bent. For most varieties that sweet spot is at 3 to 6 inches depending on type. Check plants every day or every other day at most. Pods grow fast in hot weather & sometimes double in size overnight. With the new method’s deep roots and steady feeding you will see not just a few pods per plant but whole runs of them. Each node along the stem offers another cluster. Use your fingers or pruners to cut pods just above the cap where the pod meets the stem. If you feel resistance when you try to snap the pod or the skin feels rough and hard it is past its prime. Harvest those separately & let them dry fully for seeds but do not let them remain on the plant too long. Overmature pods signal mission accomplished & flowering will slow down. For even more branching and pod production you can gently pinch out the very tip of the main stem when the plant is 2 to 3 feet tall. This encourages side shoots and each one becomes another runway for flowers. In rich soil with proper spacing your okra transforms from a single spear into a many-armed structure with every arm covered in pods. The satisfaction is almost physical. The soft thud of pods in the basket and the sticky-sweet smell of fresh sap when you cut them create a rhythmic experience as you move from plant to plant. This is not just gardening but a kind of summer routine.
Heat-Tolerant Varieties and Local Tweaks: Making the Method Yours
# Adapting the Method to Your Climate The method works in any climate but the specific details let you customize it for your location. In the hottest areas like the Deep South and desert Southwest and tropical zones okra thrives when you follow these steps. In cooler regions with shorter summers you may need to modify parts of the system to get the best results from your growing season. Select varieties known for heat tolerance and high yields. Traditional options like Clemson Spineless remain excellent choices but many newer varieties offer improved vigor and larger pods. Some types produce long smooth pods ideal for slicing while others grow thicker ribbed pods that work well in stews and for grilling. Plant several varieties together to discover which ones perform best in your specific location. In regions with cooler summers start seeds indoors in deep containers 3 to 4 weeks before the soil warms up and then transplant them carefully once nighttime temperatures rise. Use dark mulch or low tunnels early in the season to warm the soil more quickly. Once genuine heat arrives remove anything that traps excess humidity because okra prefers hot conditions rather than stagnant air. In extremely hot and dry areas your approach changes somewhat. Shade cloth on the western edge of your garden can protect plants from intense afternoon sun particularly when they are young. Drip irrigation under mulch delivers water exactly where needed and reduces water loss from evaporation. The deep soil preparation and nutrient trench become essential for storing moisture from winter and spring to sustain plants through the long hot months. Regardless of your location the core principles stay the same: deep healthy soil with proper spacing and soaked seeds plus thick mulch and thorough watering combined with a harvest schedule that keeps plants producing continuously. You are not working against the heat but using it to your advantage.