
The bathroom light looks different at 7 a.m. You notice it when you lean over the sink with your toothbrush and see your hair in the mirror. Those bright streaks that made you feel like you just finished a beach photoshoot a few months ago now look dull. The brightness has moved down toward the ends and your roots feel heavier and darker. The whole thing seems less like effortless style and more like you forgot your salon appointment twice. You tilt your head & pull a strand forward. Then a quiet rebellious thought appears in your mind about touching it up yourself. The idea feels both practical and slightly dangerous. You have watched enough tutorial videos to know the basic steps. You have seen the before and after photos that make it look simple enough. But you also remember the stories from friends who tried home coloring and ended up with unexpected results. The bathroom mirror shows you the truth about your current situation. Your hair needs attention and you are considering whether to handle it alone or schedule that overdue appointment. You think about the cost of salon visits & the time it takes to get there. You consider the convenience of fixing it at home on your own schedule. The box of hair color at the drugstore costs a fraction of what the salon charges. But you also know that professional colorists spend years learning their craft for good reasons. They understand things about hair chemistry and color theory that a tutorial video cannot fully explain.
The Moment You Decide: “I Can Do This at Home”
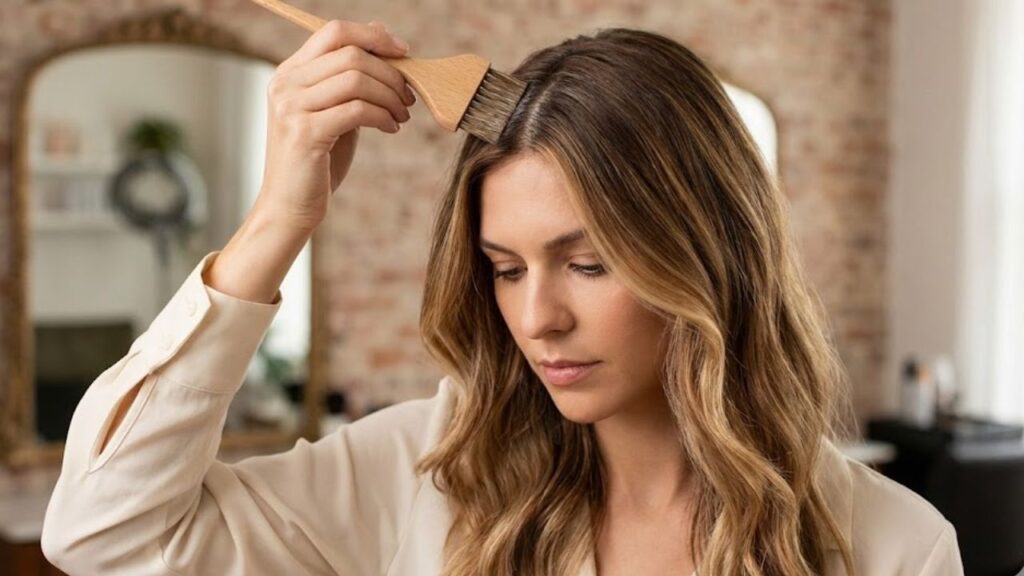
There’s a special rush that comes with deciding to refresh your balayage at home. It’s similar to trimming your own bangs—but this time, you’re doing it thoughtfully, with preparation and a bit of science on your side. Balayage is naturally forgiving. Unlike traditional foil highlights that start at the scalp in rigid sections, balayage is painted softly along the surface of the hair. It mimics natural sun-lightening: brighter at the ends, subtler near the roots. That gentle diffusion is exactly why balayage can be safely refreshed at home. You’re not rebuilding a pattern—you’re simply bringing light back where it’s faded.

Studying Your Hair Before You Start
Before touching any product, stand in good natural light and let your hair fall the way you usually wear it. Observe it carefully. Where has the brightness softened? Which lighter ribbons still pop, and which have blended away? You’re not just applying color—you’re reading your hair. The key to a confident at-home balayage touch-up is enhancement, not reinvention. Think of it as gentle maintenance, guided by what already looks good, rather than starting from scratch.

| Item | Purpose | Pro Tip |
|---|---|---|
| Lightener (bleach) & developer | Lifts your natural or colored hair lighter | Choose a gentle 10–20 volume for a subtle touch-up |
| Balayage or tint brush | For painting precise, feathered strokes | A brush with a tapered edge helps blend softly |
| Plastic bowl (not metal) | To mix your lightener and developer | Mix small batches so it stays creamy and active |
| Sectioning clips | Keeps hair organized and manageable | Four big clips (front and back on each side) are usually enough |
| Gloves & old T-shirt | Protects your skin and clothes | Choose a dark or already-stained shirt you won’t miss |
| Foil or plastic wrap (optional) | Can help keep sections separate and process evenly | Use sparingly; balayage loves open air |
| Toner or gloss | Refines the final shade (cooler, warmer, softer) | Opt for a demi-permanent formula for softness and shine |
| Deep conditioner | Replenishes moisture after lightening | Leave on for at least 10–15 minutes |
Take a moment to look at what you have in front of you. The goal is not to build a professional salon setup at home. You just need the basic items that give you control and help you take care of your hair properly. If this already feels like too much then you should make it easier. Work with fewer sections and use gentler lightening products. There is no rush here. You decide how fast or slow this goes.
Creating a Small Color Studio at Home
Your bathroom counter becomes your personal color station. Lay down a towel, set a calm mood, and arrange your tools deliberately. Treat it like a small creative project, not a rushed task. When everything is within reach and organized, your movements become steadier and your decisions more intentional. This calm setup alone reduces most at-home coloring mistakes.
Mapping Your Hair: Where Light Naturally Belongs
Balayage isn’t about coloring every strand. It’s about placement. Imagine your head as a map showing where sunlight naturally lands. These areas—especially the top layers and front—are where your focus should be. Strategic placement creates an effortless, sunlit look without over-lightening or flattening your color.
Face-Framing “Money Pieces”
The strands that fall around your face play a huge role in how fresh your hair looks. When these pieces are softly brightened, your entire face appears lifted and awake. For an at-home refresh, focusing only on these front sections can be enough. You don’t need to touch the back if you’re unsure. A little brightness in the right place can transform everything.
Surface Hair vs. Inner Depth
Lift a top layer of your hair and notice the contrast underneath. The inner layers are deeper and darker, creating dimension. Your balayage touch-up should stay mostly on the surface pieces. Leaving the depth intact prevents your hair from turning into one flat, overly light shade and keeps the color looking natural.
Protecting the Root Shadow
The soft root shadow is what makes balayage look expensive and low-maintenance. Avoid starting lightener at the scalp. Begin a few inches down and feather upward gently. This preserves the natural gradient and avoids harsh lines. You’re refreshing sunlight, not erasing shadows.
Applying Lightener with Control
Mixing lightener can feel intimidating, but calm, deliberate movements make all the difference. Start with a strand test on a hidden section to understand how your hair lifts. This tells you how fast to work and how long to process. Knowledge replaces fear here.

Sectioning for Precision
Divide your hair into four main sections, then work in thin slices—about the width of a pinky. Thin sections give you control and prevent chunky results. Skip every second or third slice to maintain depth. Balayage relies on negative space as much as color.
The Balayage Brush Stroke
Apply lightener starting at the mid-lengths, pressing gently, then glide downward with softer pressure. As you move upward, barely touch the hair to blur the transition. If a line looks harsh, soften it with your brush tip or gloved fingers. Think of watercolor edges, not straight lines.
Processing Time and Patience
Once the lightener is on, check your hair regularly based on your strand test. Hair often lifts through warm stages before reaching a soft blonde. You don’t need to push it too far. Subtle lift paired with toner usually gives the most natural result. Never exceed the recommended time—lighter isn’t always better.
Rinsing Gently
Rinse thoroughly with lukewarm water, treating your hair delicately. Avoid hot water and rough scrubbing. At this stage, hair is more fragile. Pat dry with a towel until damp if you plan to tone next.
Toner: Setting the Final Mood
Toner shapes the final personality of your balayage. Whether you prefer cool, neutral, or warm tones, apply toner mainly to the lightest areas first. Watch closely, as freshly lightened hair absorbs color quickly. Once satisfied, rinse and follow with a deep conditioning treatment.
Seeing the Final Result
As you blow-dry your hair, the results reveal themselves gradually. Brighter ribbons, softer blends, and face-framing light come together naturally. At-home balayage often looks best when it’s slightly imperfect—those small variations make it feel real and sun-kissed rather than manufactured.
Maintaining Your Balayage Between Touch-Ups
Gentle care extends the life of your color. Wash less frequently, use sulfate-free shampoos, and incorporate toning products sparingly. Weekly deep conditioning keeps the cuticle smooth so light reflects beautifully. Balayage is designed to age gracefully—don’t rush to fix every bit of regrowth.
Confidence Beyond the Mirror
Touching up balayage at home isn’t about replacing your stylist. It’s about understanding your hair and trusting yourself. With each session, you learn restraint, timing, and placement. That quiet confidence—earned through patience and care—shows in the final result just as much as the color itself.