
The grout was the first thing you noticed even if you didn’t have the words for it. Not the soft gleam of the porcelain tiles or the way the afternoon light poured across the kitchen floor but those thin tired lines between them. Once crisp & pale they had dulled to the color of old dishwater. You paused with your coffee mug in hand & realized the room felt more worn out than it really was simply because of those dingy seams tracing the floor like a faded map. This is the quiet power of grout. When it’s fresh it frames every tile and sharpens every edge and makes a space feel intentional and clean. When it’s stained or cracked or uneven it drags the whole floor & the whole room down with it. The good news is that refreshing grout lines on porcelain tile doesn’t require a contractor or a weekend lost in chaos or a renovation budget. With a few simple tools & some patience and a bit of technique you can transform your floor dramatically & effectively. You can watch those lines go from lifeless to luminous one careful stroke at a time.
The Moment You Truly Notice Your Floor
It usually begins with a small area. Perhaps it’s the patch of porcelain tile near the stove, where splashes and spills land almost daily. Or the entryway, slowly dulled by muddy shoes and fine grit ground in over time. For months, it’s easy to tell yourself the floor is “just dirty.” You mop, scrub, and even switch cleaners. The tiles shine briefly, but the grout remains dark and uneven, quietly holding onto every footprint and spill. Because grout is porous, it absorbs moisture and dirt easily. Over time, once-light grout slowly darkens—until one day, you really see it.

Understanding What Your Grout Is Showing You
Before jumping into cleaning, it helps to pause and look closely. Follow a single grout line across the room. Is it simply discolored, or is it cracked or missing in places? If the grout is intact but darkened, that’s good news—you’re dealing with stains, not structural damage. A deep clean and color refresh may be all it needs. If it’s crumbling or pulling away from the tile edges, repairs come first. Either way, the process follows a steady rhythm: clean thoroughly, repair if necessary, refresh the color, and protect the surface.

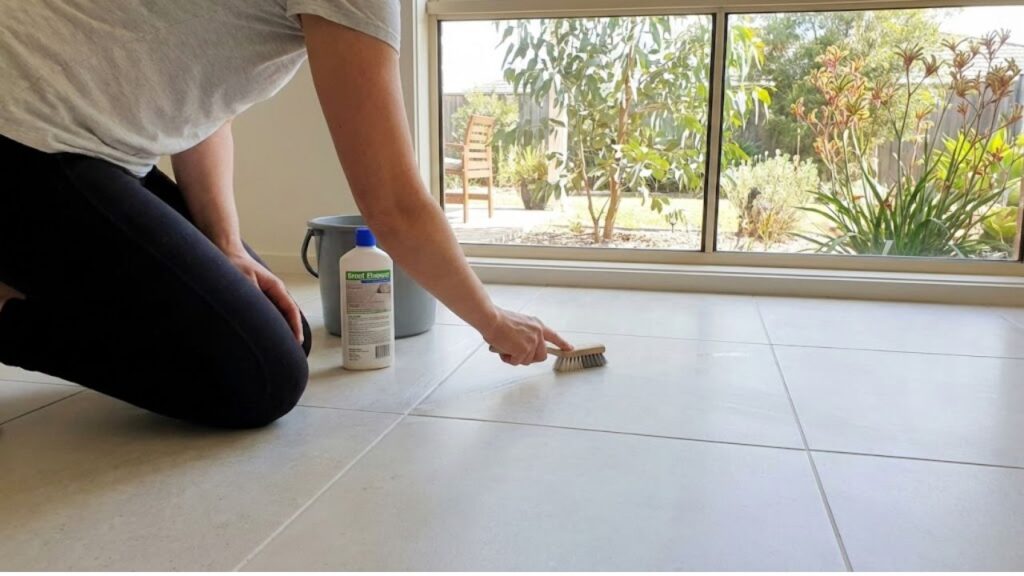
Assembling a Simple, Effective Toolkit
You don’t need complicated tools or harsh chemicals. A thoughtful setup works best: a vacuum or broom, a pH-neutral cleaner, a soft-bristle brush, microfiber cloths, and your chosen grout colorant or whitening pen. Keeping everything nearby lets you move easily across the room. This approach protects your porcelain tiles while allowing you to work carefully within the narrow grout lines where the real transformation happens.
| Tool / Material | Primary Use | Important Tips |
|---|---|---|
| Soft-bristle or grout brush | Loosens and removes dirt from grout lines | Avoid wire or metal bristles to prevent tile scratches |
| pH-balanced tile and grout cleaner | Cleans deeply without damaging grout | Safe choice for sealed, colored, and delicate grout |
| Microfiber cloths & soft sponge | Wipes residue and polishes tile surface | Helps reduce streaks, especially on porcelain tiles |
| Grout color pen or grout colorant | Renews or changes grout appearance | Ensure compatibility with sanded or unsanded grout |
| Penetrating grout sealer | Shields grout from stains and moisture | Best suited for kitchens, bathrooms, and entry areas |
| Optional: grout saw & mini float | Repairs cracked or damaged grout sections | Work slowly to avoid chipping tile edges |
Deep Cleaning: Preparing the Surface
Begin by sweeping or vacuuming to remove loose grit that could scratch the tile. Then mix your cleaner exactly as directed—stronger solutions won’t help and may damage grout. Apply the cleaner directly to the grout and let it sit for a few minutes to loosen embedded dirt. Scrub gently along the lines, wipe away residue with a damp sponge, and dry with a microfiber cloth. As you move section by section, the grout shifts from dull to uneven to clean and uniform. This patience ensures an even result later.

Refreshing the Look: Whitening and Recoloring Grout
Once the floor is completely dry, reassess the color. If it still feels off, grout whitening pens or liquid colorants can make a dramatic difference. Choose a shade that complements your tile—light tones soften the look, while darker lines create contrast. Apply slowly along each grout line, wiping excess colorant from the porcelain tiles right away. The change happens in real time, sharpening the entire floor pattern and making the space feel intentional and renewed.
Sealing for Long-Lasting Results
Freshly cleaned or recolored grout needs protection. After the colorant cures, apply a penetrating grout sealer along each line. The sealer soaks into the grout pores, creating an invisible barrier against moisture and stains. Wipe any excess from the tile surface and allow proper curing time. This quiet final step preserves your work, helping the grout resist daily wear and keeping the floor looking bright longer.
Enjoying a Floor That Feels New Again
In the days that follow, the difference is noticeable. Light reflects cleanly between tiles, and the room feels sharper and more cared for. Maintenance becomes simple—regular sweeping, gentle mopping, and quick attention to spills. Over time, you’ll recognize the early signs of wear and know exactly how to respond. Refreshing grout may not be flashy, but it delivers a deeply satisfying sense of renewal, restoring clarity and comfort to a space you use every day.