
The first time you grow potatoes in bags it feels like gardening magic. You roll down a fabric sack and drop in a few seed potatoes and cover them with soil. Then magic begins. Weeks later you plunge your hands into that same bag and feel smooth tubers hiding in the dark like buried treasure. No big backyard needed. No perfect soil required. Just a bag and some dirt and a quiet corner of a balcony or patio or driveway that suddenly becomes a potato patch.
The Quiet Joy of a Potato Bag Garden
There’s something grounding about growing potatoes in bags. It’s simple and forgiving and oddly intimate. Instead of kneeling in a sprawling plot you’re crouched beside a container watching green foliage spill over the sides. You can move your garden if a storm is coming or chase the sunlight across a small courtyard or slip a bag behind a chair on a tiny balcony. Potatoes are surprisingly willing to adapt. Imagine waking up & stepping outside with your coffee and brushing your fingers along the soft leaves. The air smells faintly of damp compost and chlorophyll. Ladybugs patrol the stems. A bumblebee pauses at a stray potato flower with pollen dusting its legs. All this is happening not in some idyllic countryside but beside a brick wall or on a rooftop or under the stairs of an apartment stoop. Growing potatoes in bags doesn’t demand that you already know what you’re doing. It simply asks that you’re curious enough to try. The rest falls into place with a little guidance.

Gathering Your Tools: Turning Any Corner into Potato Country
Before those green shoots appear you’ll need a few basic supplies. The nice part is that none of them are exotic and many can be repurposed from things you already have lying around.

Choosing the Right Bag
Potatoes don’t need a fancy home but they do need one that drains well and gives their roots room to explore. Think of the bag as a temporary underground ecosystem.
| Bag Type | Pros | Cons |
|---|---|---|
| Fabric Grow Bags (7–15 Gallon) | Excellent drainage and airflow; reusable material; built-in handles make moving easy. | Soil dries faster; requires regular and consistent watering. |
| Sturdy Plastic Potato Bags | Lightweight design; flap opening allows potato checks; retains moisture well. | May overheat under strong sunlight; proper drainage holes are essential. |
| Upcycled Buckets or Sacks | Low-cost or free option; customizable sizes; ideal for DIY gardening. | Drainage holes must be added carefully; some materials weaken in direct sun. |
Soil, Seed Potatoes, and the Not-So-Secret Ingredients
Potatoes grow best in loose and airy soil. The texture should be fluffy instead of heavy. When you grab some soil and squeeze it the mixture should clump together lightly and then break apart easily when you touch it. Do not use pure garden soil or heavy clay because these materials compact too much and prevent the tubers from growing properly. For each growing bag you should create a mixture using these proportions. Use two parts of high-quality potting mix that does not contain slow-release herbicides. Add one part of well-rotted compost that should not smell bad or feel slimy. You can also add a small amount of organic potato fertilizer or balanced vegetable feed if you want. The other important component is your seed potatoes. These are different from regular potatoes that have started sprouting in your kitchen. Real seed potatoes are grown specifically to be free from disease and to grow vigorously. They come firm & plump and are ready to produce sprouts from their eyes. Early varieties & mid-season types & late varieties all grow well in bags. Many people who are just starting out prefer to use early or second-early types because they mature more quickly & have fewer problems with disease. You can picture yourself lifting a bag in early summer and discovering many new potatoes that are small enough to cover with butter and eat with your hands.
Planting Your First Bag: Layering for Hidden Abundance
Step 1: Preparing the Seed Potatoes
Begin by spreading your seed potatoes in a single layer on a sunny windowsill or a bright indoor shelf. Leave them there for a few days so they can develop short, sturdy sprouts. This process is known as “chitting.” The goal is to encourage firm potatoes with dark, compact shoots rather than long, pale, weak ones.
If your seed potatoes are larger than a small egg, cut them into pieces, making sure each piece has at least two healthy eyes. Allow the cut surfaces to dry and form a callus for one to two days. This simple step reduces the risk of rot once the potatoes are planted.
Step 2: Creating the Base Layer
Place your grow bag in its permanent position before filling it, as a bag full of damp soil can be heavy and difficult to move. Roll the sides of the bag down, similar to cuffing boots, leaving about 20–25 cm (8–10 inches) of height exposed.
Add 10–15 cm (4–6 inches) of prepared soil mix to the bottom and level it gently. This layer forms the foundation where the potatoes will begin growing beneath the surface.
Step 3: Planting the Seed Potatoes
Set the seed potatoes on the soil with their sprouts facing upward. In a 10–15 gallon bag, planting three to four seed potatoes is ideal. Space them evenly so each has room to develop.
Cover the potatoes with another 10–15 cm (4–6 inches) of soil. Lightly press the surface so it feels springy rather than compacted. Water slowly until the soil is evenly moist. Avoid overwatering; if water pours out when you squeeze the soil, it is too wet.
The Art of Earthing Up: Boosting Tuber Formation
Potatoes form tubers along underground stems rather than on roots. By gradually burying more of the stem as the plant grows, you increase the number of potential tubers.

Watching for the First Shoots
After one to three weeks, green shoots will emerge from the soil. Allow these shoots to grow to about 15–20 cm (6–8 inches) tall. At this stage, the plants resemble small versions of mature potato plants with healthy green leaves.
Layer by Layer: Filling the Bag
Add more soil around the stems, covering the lower leaves while leaving the top foliage exposed. Water well after each addition of soil. Repeat this process every time the plants grow another 10–15 cm (4–6 inches), gradually unrolling the bag and filling it.
Eventually, the bag will be nearly full, with lush foliage above and developing tubers hidden below the soil.
Sun, Water, and Ongoing Care
Once the plants are established, focus on consistent care. Potato bags create a small, self-contained growing environment that responds quickly to changes in light and moisture.
Sunlight Needs
Potatoes thrive with at least six hours of direct sunlight daily. Morning sun is ideal, while intense afternoon heat can cause stress. One advantage of grow bags is that they can be moved to adjust for changing light conditions.
Watering Correctly
Check moisture by inserting your finger into the soil. If it feels dry past the first knuckle, it is time to water. Water slowly until excess moisture drains from the bottom. Mulching the surface with straw or dry leaves helps retain moisture and keep the soil cool.
Feeding and Monitoring Plant Health
If your soil mix contains compost, feeding requirements are minimal. Applying a mild organic liquid fertilizer every two to three weeks can support healthy growth. While watering, inspect the leaves for signs of pests or nutrient stress.
Chewed leaves may indicate insects, which can often be removed by hand. Yellowing can signal aging or nutrient imbalance, while persistent wilting may mean heat stress or drainage issues.
Harvest Time: Collecting Your Potatoes
Harvesting is the most rewarding stage. For early potatoes, you can gently remove a few tubers once the plants begin flowering. For a full harvest, wait until the foliage yellows and dies back naturally.
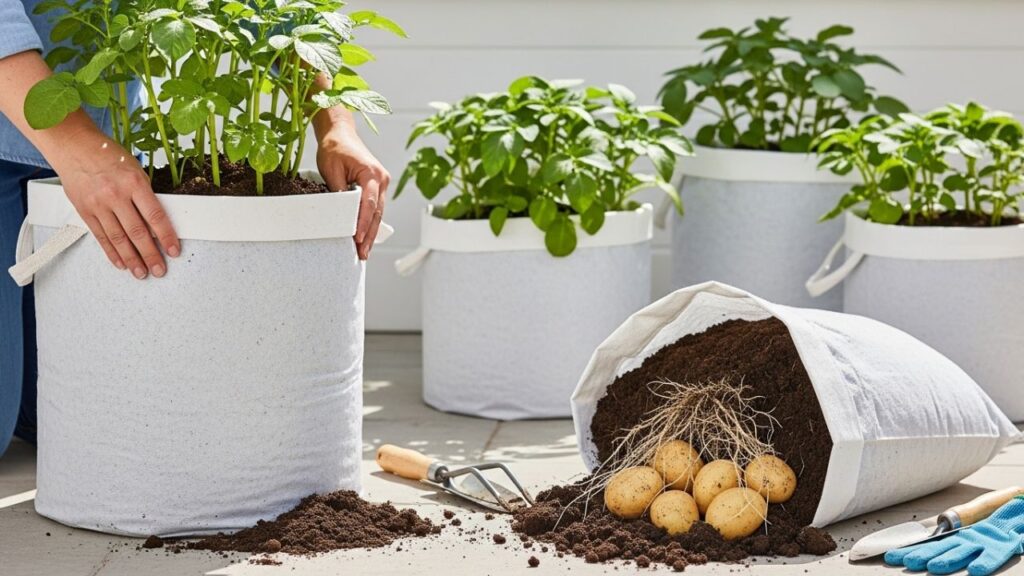
Harvesting Methods
You can tip the entire bag onto a tarp and sift through the soil to collect the potatoes, or remove them gradually through a side opening if the bag allows. Both methods reveal the crop without damaging the tubers.
After the Harvest
Once harvesting is complete, remove old roots and reuse the soil for other plants by mixing in fresh compost. Avoid growing potatoes in the same soil again immediately to reduce disease risk.
Building Confidence with Each Season
Starting with one grow bag often leads to expanding into several. Over time, you may experiment with different varieties and stagger planting times for a continuous harvest. Each season builds experience and confidence.